Archive for the ‘Hobbies and Do-It-Myself Projects’ Category
Wrappily Entertained
Posted on: May 22, 2014
All photos are “clickable” for a larger image
So a few weeks ago, Sara Irene Smith tossed out a challenge to her social media partners in crime regarding Earth Day and her company’s product. Sara is the founder of Wrappily, a company that advertises itself as offering “chic gift wrap with an eco-friendly twist.” Oh, save me a couple hundred words by checking it out yourself here and then come back.
Did you? Cool, yeah? Anyway, back to the story…
She offered to send a supply of gift wrap to anyone who was willing to use it for a project and photograph the results, to be used in conjuction with Earth Day.
Of course I raised my cyber hand.
Now most normal people would receive the paper and use it in a nice gift-wrap kinda way. But since I’m on this insane Mod Podge-ing cheap used furniture tangent, so that’s what I decided to tackle. She chose the design, so when I received my goodie bag, I had two designs to choose from: a green/blue abstract pattern and the one you’ll see in the following pictures. I have to say – I loved the product, and immediately wanted to buy people presents, just so I could wrap them. But back to the project …
Couldn’t find the right piece of furniture at Salvation Army so I decided to re-vamp my own little beat up particle board night stand. I think I bought it as a do-it-yourself piece of furniture for my son’s first bedroom. He turns 21 next month. So….

It needed some help.
My bedroom is an odd assortment of pinks and burgundies, so I figured I’d make this match. First step: spray paint.
Second step: remember to not leave a heavy piece of particle board furniture on a flimsy plastic platform. It fell over and took me forever to unstick all the grass from the side. Yes, I swore a lot.

My first disaster
After painting all areas except the ones that I planned to cover with the Wrappily paper, I was ready to begin. The paper – which has a different print on each side, btw – had soft creases, as gift wrap does. For this project, I decided to iron the sheets, to smooth out the lines a bit. Note: this is the opposite side, and also a very cool print.

Ironing the paper to give it a crisp feel
Normally I use a heavier paper, so this was challenging. It’s newsprint, which is PERFECT for gift wrap but a little light for Mod Podge-ing. But I’ve done it a lot so I made sure to give it plenty of drying time between coats.
Originally, my plan was to use the paper on the top, drawer front, and bottom skirt panel. But when I did it, although I liked the look in general, I knew it would be too much for my room. I simply have too many other crazy designs going on in there.

After walking around it in my living room for a couple of days, I finally decided to change the front panel to a solid burgundy:

I thought that worked a lot better in my room, so I’m glad I made the change. The next step is always the most challenging for me … finding a drawer pull that I like. I couldn’t find anything in Lahaina, and I really needed to get the darn thing out of my living room (remote controlling “around it” was an interesting gymnastic maneuver) so I reverted to a trick I used when I couldn’t find drawer pulls for my desk. I raided my bead stash and came up with this, as a makeshift drawer pull:

Beaded Drawer Pull detail
Isn’t that cute? I really like it. Cautionary note about beads as drawer pulls – make sure that whatever material you use to string them is strong, and likewise for the method of fastening it. I strung them on a hemp cord (hemp is nearly indestructible) and knotted it like a sailor on steroids, on the inside.
Well, I finally got it back where it belongs and here it is:

The finished product!
I still would like to do some sort of finishing around the top edges, where the particle board has gotten a little funky, but haven’t figured out what or how. But I will. In the meantime, I love my spiffy little updated nightstand, and am now happily a Wrappily customer forever.
Sorry, had to do the “happily Wrappily” thing. Couldn’t resist.
Anyway … Mahalo, Sara. That was fun!
Our Lady of Abandoned Furniture
Posted on: July 27, 2013
Okay, so…
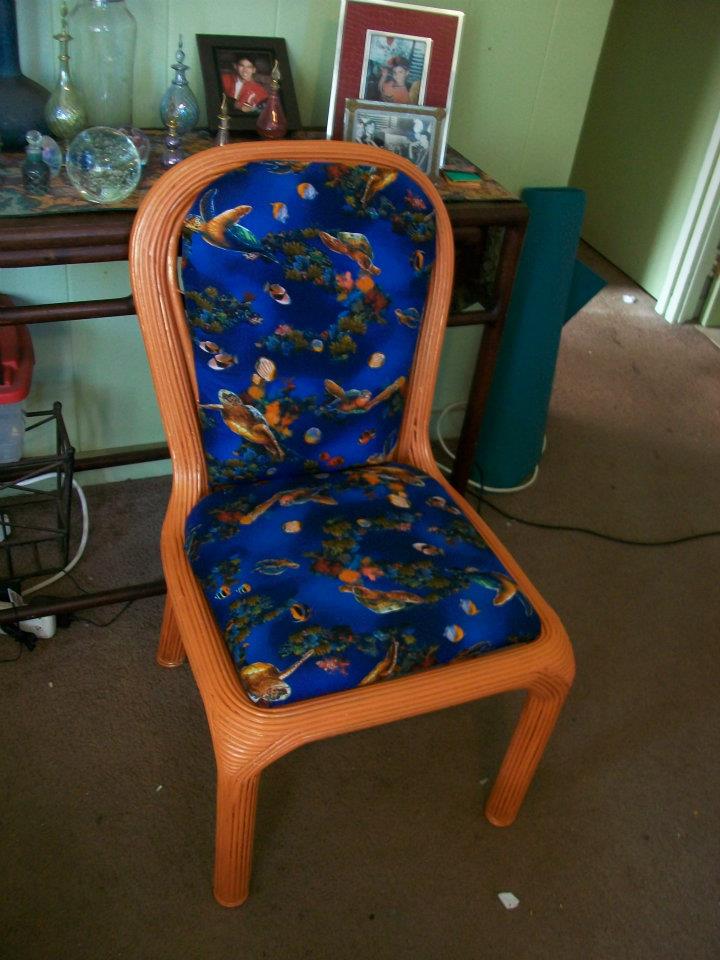
In the continuing saga of Marti Needs a Life, here’s where we stand on the furniture rehab projects. In trying to make a desk and chair fit together, I took these two things


and tried to make them look like they belonged in the same room, without making them too matchy-matchy (yes, I watched Project Runway, thank you Nina Garcia)
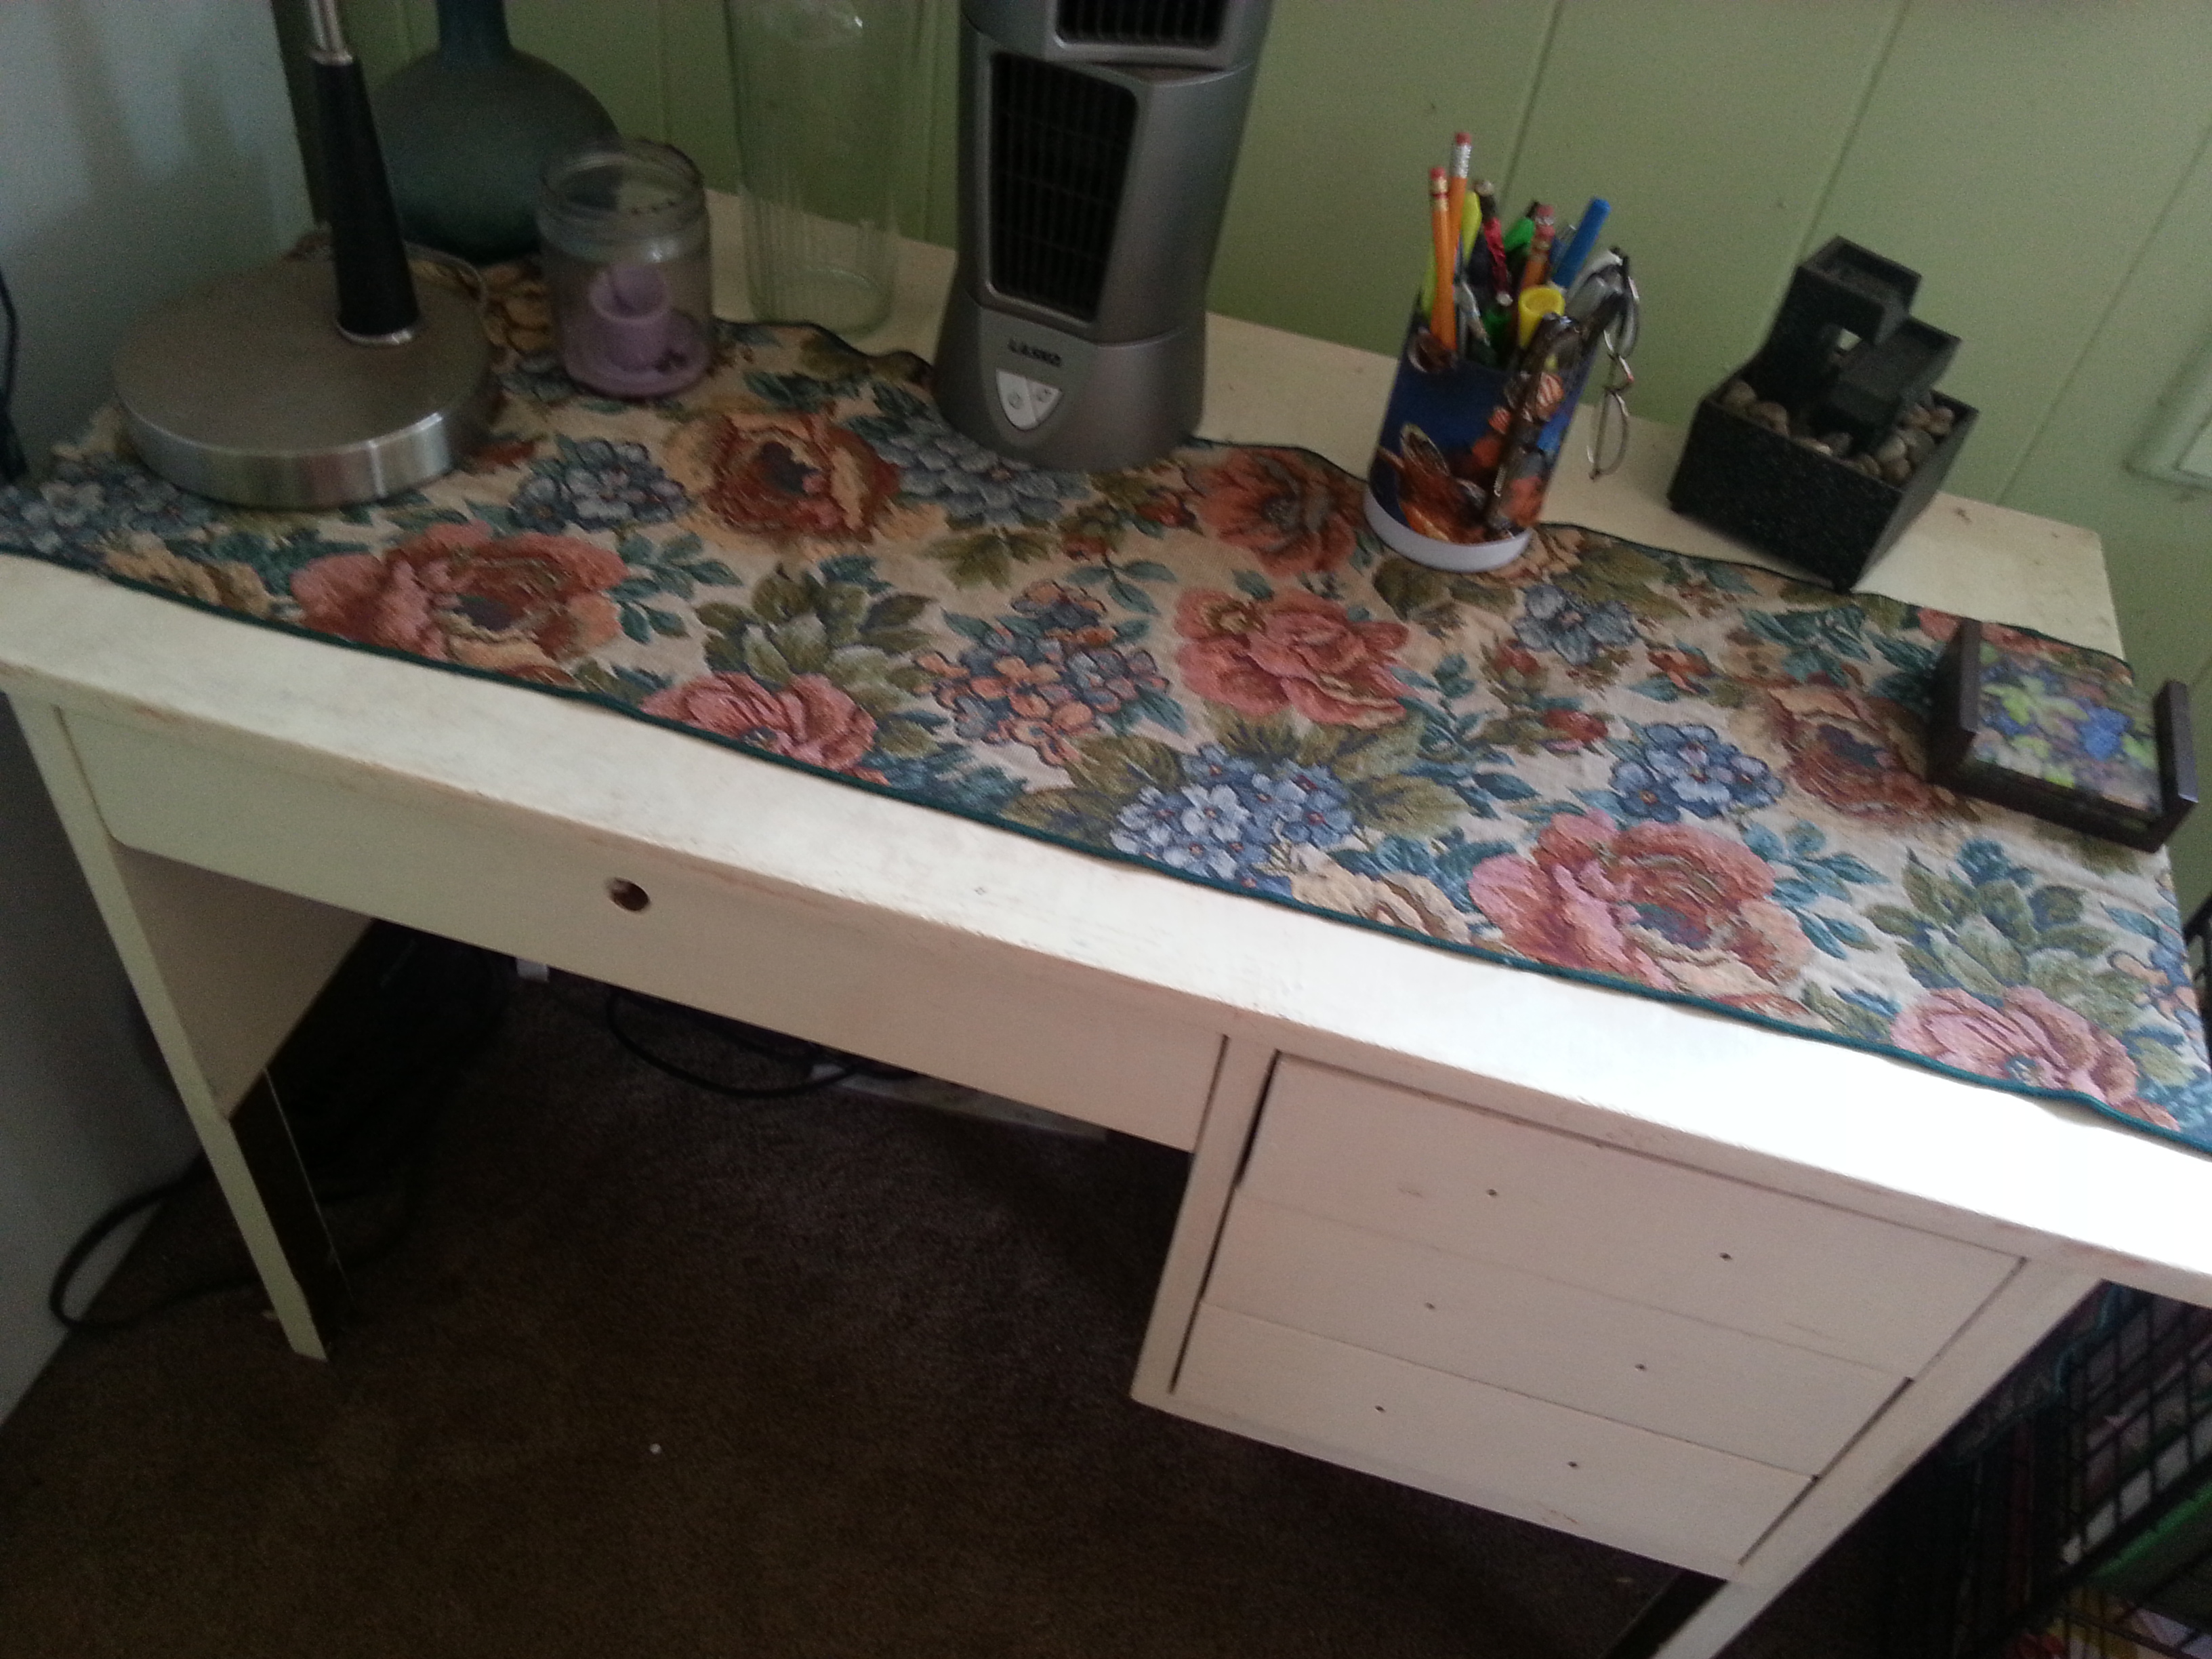
The chair came out great, but I was never able to figure out how to finish the desk. This is what happened:
So last week I was at my neighborhood Salvation Army Thrift Store and I saw this:

And it hit me …
Instead of trying to match the desk and the chair to each other, I could just tie the crazy chair in with something ELSE in the room. So that’s what I’m working on now.
I’ve painted it:

And I’m thinking about getting maybe a piece of glass for the top and painting a design on it – maybe a cool blue floral thing in one of the corners on something. I don’t know. Still open to ideas. Got any?
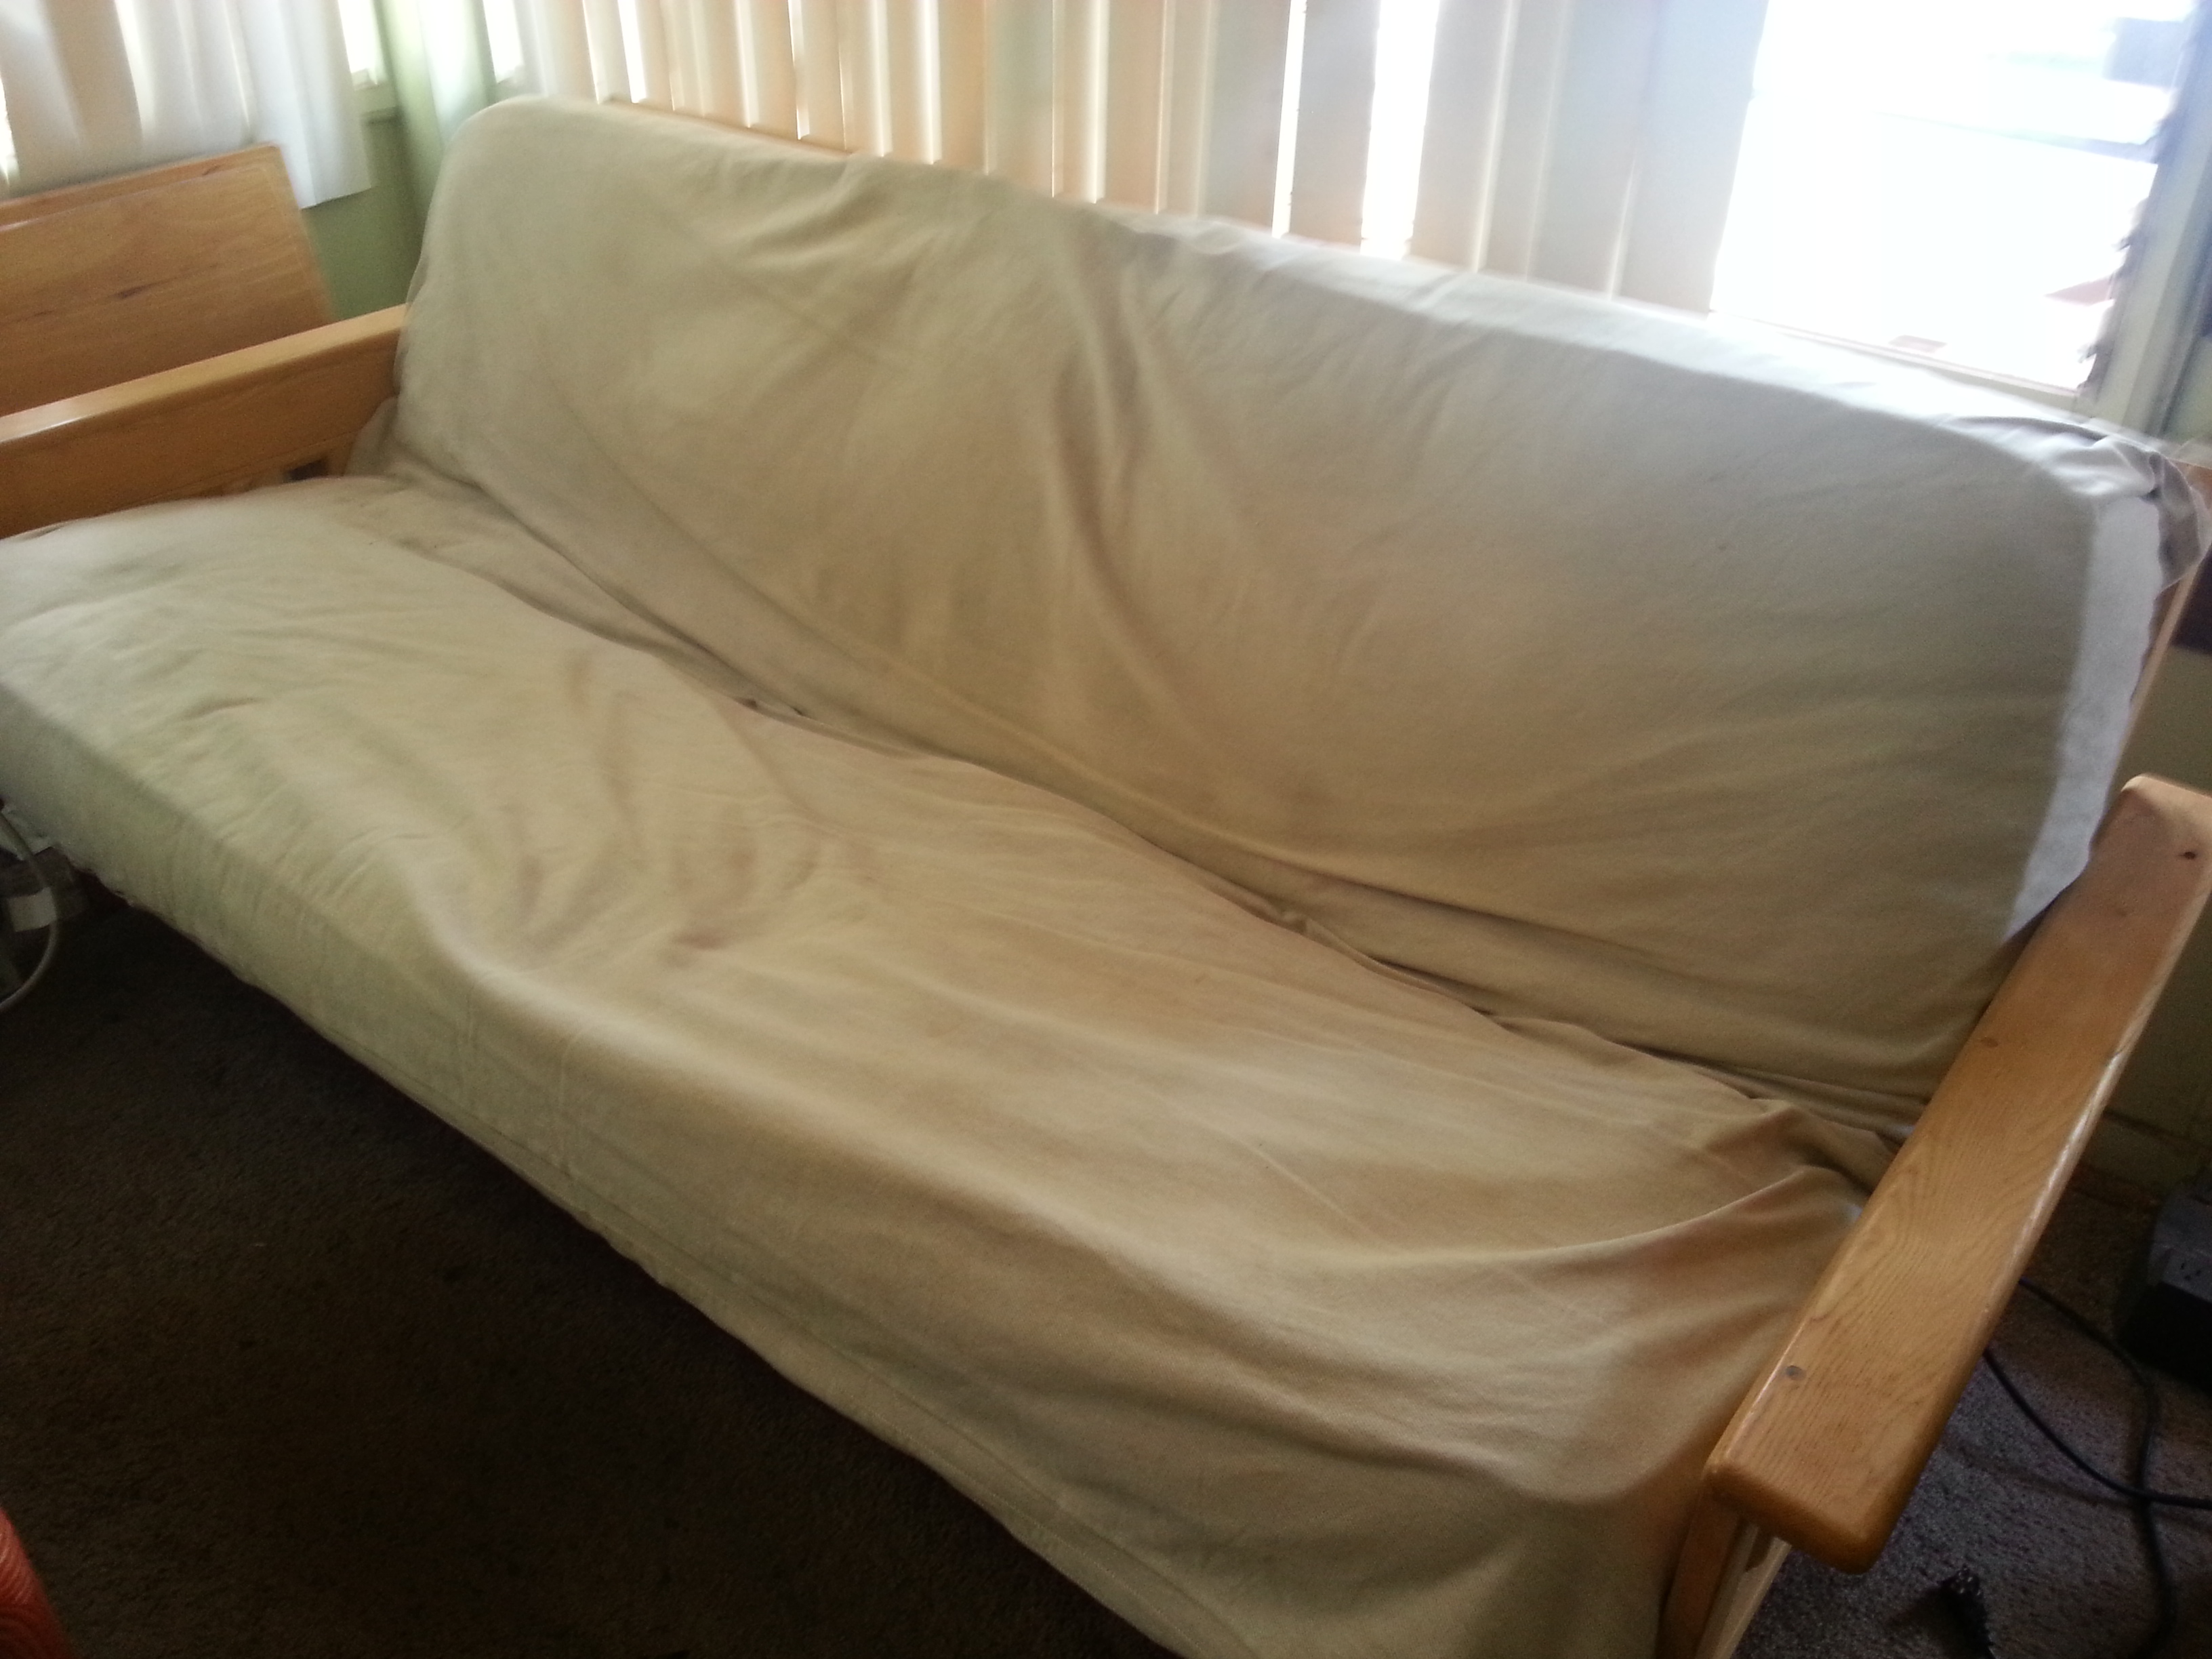
And while you’re at it, factor these two pieces in and let me know if you have ideas for them,.
My futon sofa for which I want to get/make an interesting cover:
And my favorite table, which doesn’t match anything, but I love it.

Anyway, I welcome/want/need brainstorming from you all!
xoxo,
me
